![[PukiWiki]](image/Concept_logo.jpg "[PukiWiki]")
Tutorial?
※This tutorial is valid for SIGVerse 2.2.0 or later. ※This tutorial requires Windows 8.1 and Kinect for Windows SDK 2.0.
This tutorial introduces a method to control a human avatar using KinectV2 sensor
A plug-in module for the SIGViewer receives motion data from Kinect, calculates Quaternion of each joint, and send the data to avatar controller on the server.
Connect your Kinect to the client PC.
A controller receives joint angle data; controls the avatar's joints.
Create a controller file kinectController.cpp as follows:
This controller receives messages from Kinect; rotates each joint of an avatar.
Compile with the following command.
$ ./sigmake.sh kinectController.cpp
Create world file kinectWorld.xml as follows:
Just an avator will be appeared in this world. This sample controls only one human avatar by the Kinect.
Start the SIGVerse server
$ sigserver.sh -w ./kinectWorld.xml
Next, run the SIGViewer and connect to the sigserver. You can see an avatar is standing.
Click the [Service]-->[Add] menu on the top-left of the SIGViewer window bar.
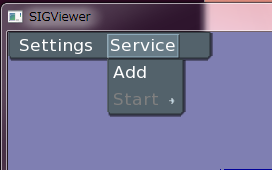
You then can see the following window. Click the Add button to registrate SIGNiUserTracker.sig
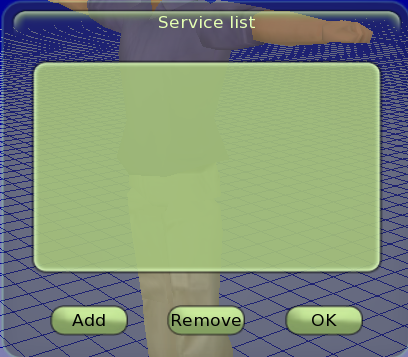
After the registration of SIGNiUserTracker.sig to the Service list, click the OK button to close the window.
Next, click the [Service]-->[Start] menu; then select the SIGNiUserTracker.sig.
If the Kinect's depth map window is appeared and you see the following message on the server, it means the application is successfully started.
[SYS] Service: "SIGKINECT" is available
Click the "START" button to start the simulation.
You can control the human avatar with the Kinect.
#ref(): File not found: "SIGNi_3.PNG" at page "Controlling Agent with KinectV2"
In this tutorial Visual C++ 2008 is used to compile the user interface plug-in.
Please download the source code from KINECT Service
Move the SIGNiUserTracker folder, which is contained in the ZIP file, to a folder which has sample codes of OpenNI.
C:\Program Files (x86)\OpenNI\Samples
Next, double-click the solution file in the SIGNiUserTracker folder with administrative right.
※You have to install boost library in the case of the version number is 1.0.0.
Right-click the solution name in the solution explorer of VC++ to build the source code. If the build succeeds, SIGNiUserTracker.exe will be created at C:\Program Files (x86)\OpenNI\Samples\Bin\Release
You can registrate the plug-in module to SIGViewer after changing the suffix from .exe to .sig.


Site admin: inamura
PukiWiki 1.5.0 Copyright © 2001-2006 PukiWiki Developers Team. License is GPL.